Since I work in web development, it makes sense for my first article to be about something essential for any web developer - a web server. Some people struggle with its installation, while others avoid switching to Linux because they fear setting up a web server. Many have asked me to explain how to install and configure LAMP. For those unfamiliar, LAMP stands for Linux, Apache, MySQL, and PHP.
If you already have Linux installed, we just need to install the remaining components. If not, that is beyond the scope of this article, and you will not be able to install LAMP. An internet connection is required to download the necessary packages. I suggest installing each component separately for clarity.
Installing MySQL
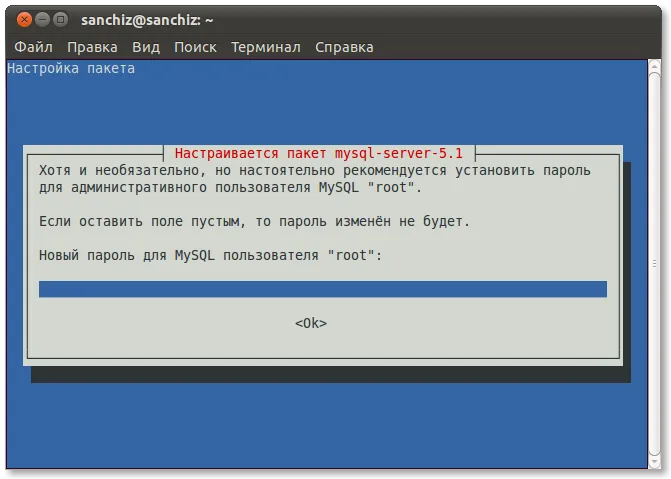
sudo apt-get install mysql-server mysql-clientA ~23 MB archive will be downloaded, followed by the MySQL installation process. A prompt will appear asking you to set a root password for MySQL. Enter a password, then confirm it. This completes the MySQL installation.
Installing Apache
Next, let’s install Apache by running the following command in the terminal:
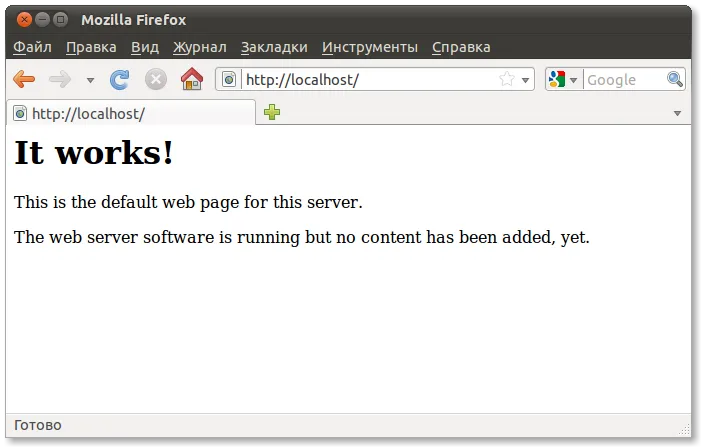
sudo apt-get install apache2If everything goes smoothly, you should see a message like Starting web server apache2 [ OK ]. To verify that Apache is running, open a browser and go to http://localhost or http://127.0.0.1. If Apache is working correctly, you should see a default welcome page.
Installing PHP
Now, let’s install PHP with additional modules:
sudo apt-get install php5 libapache2-mod-php5 php5-mysqlFor additional modules:
sudo apt-get install php5-gd php5-imagick php5-pspell php5-recode php5-xmlrpc php5-xsl php5-mcrypt php5-memcache php5-curl php-pear php5-imap php5-snmpTo test PHP, create a test file in the server’s root directory. I will use vi, but you can use any editor:
sudo vi /var/www/index.phpAdd the following content:
<?php
phpinfo();
?>
Save the file, then open a browser and visit http://localhost/index.php.
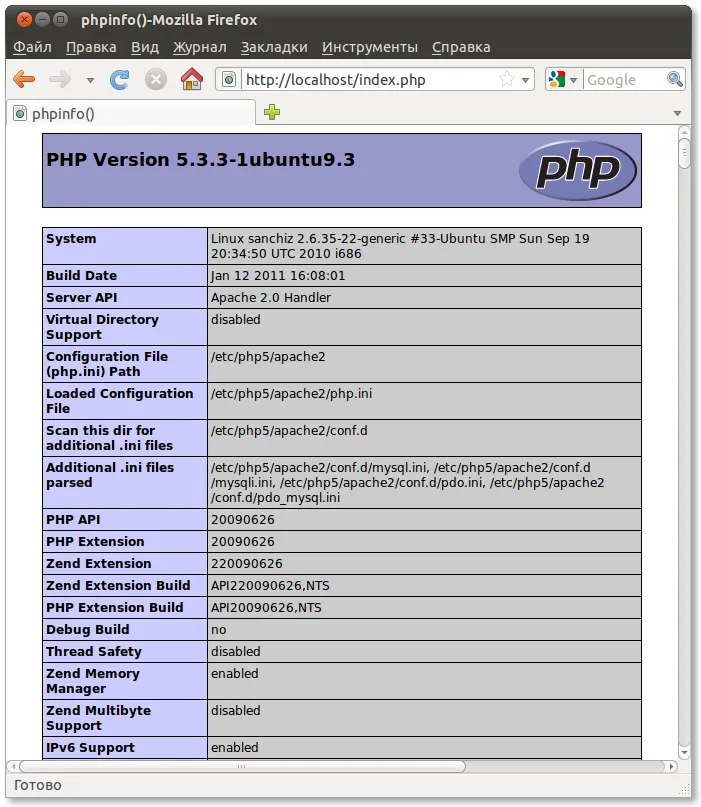
If nothing appears, try reloading Apache:
sudo /etc/init.d/apache2 reloadInstalling PhpMyAdmin
To simplify MySQL management, install PhpMyAdmin:
sudo apt-get install phpmyadminDuring installation, use the space bar to select apache2, then press Enter. Next, confirm the setup by choosing Yes when prompted.
Enter your MySQL password and set up a password for PhpMyAdmin.
If you get a 404 Not Found error when visiting http://localhost/phpmyadmin, create a symbolic link:
sudo ln -s /usr/share/phpmyadmin/ /var/wwwNow, PhpMyAdmin should be accessible.
Managing LAMP
Use the following commands to control the LAMP stack:
sudo /etc/init.d/apache2 start
sudo /etc/init.d/apache2 restart
sudo /etc/init.d/apache2 reload
sudo /etc/init.d/apache2 stop
Now you have a fully functional web server capable of hosting PHP scripts and managing databases.
Note: If you leave the MySQL root password blank, some systems may block access due to security restrictions.